Showing posts with label how-to. Show all posts

Thursday, October 11, 2012

I need to knit something cute asap!

The weather's getting a bit chilly here in Finland. Not cold enough for proper winter hat, but just perfect for wearing a soft woolly head band. I came up with an idea to knit a head band in tube so it can be twisted and still look the same on both sides. I made it wide enough so I can hide occasional bad hair day with it.


I used some left over yarn (it matches my rubber boots!) from my stash. I've made head bands before, but this one was the first one I knitted in round. Super easy one night (or two) project while watching TV. I used 5 double pointed needles, 40 stitches, plain knit all the way. When it was long enough to go around my head, I ended it with "slip one - knit one & pass slipped stitch over". Then just twisted once and hand stitched the ends neatly together. I used less than one ball of yarn, so I still got some left for possible decorations, perhaps a crochet flower?


I think the pale pink head band would look cool on someone with darker hair. Maybe I'll make one in black too!

Sunday, July 8, 2012

Let's swap those dresses

Dress swaps are a fun way to recycle clothes and a good excuse to throw a party for girls only. Here's how I organized mine a while ago.
I sent the invitations 2-3 weeks beforehand so the guests would have time to go through their wardrobes and find items they no longer use. I knew most of my friends were planning to go to see some bands play later that evening so I figured the girls would be in the mood for a little pre party with cocktails.

Most of us wear the same sizes and have similar style, so we had plenty of stuff to swap. It doesn't matter if all guests aren't the same size though, you can always swap hats, purses, shoes and accessories.

Should there be a theme?
I think it's not necessary to have a theme, but it helps. People have so much stuff nowadays, so you might not want them to bring all their extra clothes at once. I invited friends who are all into vintage style and swing dancing so we mostly had clothing and accessories under those categories.  You could also have a summer clothes swap, or office clothes swap, anything really.

Sell it or give it?
We swapped some items and some were sold & bought. The main idea was not to make money but recycle and save money. When you invite people who know each other there shouldn't be any problems to decide on these things. It's  a great feeling to know your old favorite dresses have a good  new home in your friends wardrobe and they don't all go to strangers via drift stores.


My dress swap theme was five o'clock tea with cocktails, so we had some tea with blueberry cheesecake, home made macaroons, cucumber sandwiches etc. The cocktail was of course a martini,  but since it's summer I made it with watermelon and vodka. The recipe


I found a matching feather fashinator for my dress! I'm like a walking zoo with all the feathers and panther spots.


After swapping & cocktails we headed to the local club to dance and listen to some amazing  old school rock'n'roll bands.

I came home around 3 am, feet hurting like crazy but my heart bubbling with joy, what a perfect evening!


Friday, June 8, 2012

Dance proof pin curls

I like trying out different vintage inspired hairstyles on my medium length bob. Since my hair is now too short for most up do's I make curls if I want to have a vintage look for a night out dancing. The problem with curls and dancing is that usually curls won't last the whole night in humid air at the dance venues but I have come up with a solution that works really well for my hair.

I'm a big fan of LisaFreemontStreet's hair tutorials on YouTube. I'm not going to make my own video of pin curling since Ashley's video is very well made, see it here , I just add here some pointers I have found useful through trial and error of trying to make my curls last the whole night.

Pins in random pattern, top hair is more loosely curled than other parts
frizzy hair before brushing 

I try to be extra careful getting the ends to curl neatly inside the curl. To make sure all the curls are going to turn out beautifully I make a little test; I blow dry the hair when I've done all the pinning to accelerate the curling process and also to spot any ends poking out. If such appears I pin that part again.

I also randomly open one or two curls after one or two hour to see how damp the hair is and how's the curl turning out. If somethings wrong (hair's too wet, the curl's already too curly) I can still make adjustments.

If I have time I don't sleep with the pin curls but make them couple of hours before going out. My hair is so short in the neck that the pins fall out during the night even if I wear a scarf. If the short hair in the neck doesn't curl well, then I use curling iron to that part.

The most important part after pinning is brushing. The curls will last the whole night if you brush them well and add hairspray when you're finished. This way the curls will be one big section and not individual curls. Somehow it makes the curls last longer and you won't have individual straight parts if the curls start to fade. I sometimes back comb the neck hair for extra volume.


I like to use non-alcoholic hair products when ever possible. Usually they are not as effective as the regular ones but they're more gentle to the hair. I found one hold spray that works really well for hairdos like this, it's L'anza Healing Style spray gel. This time I also used Wella Stay Styled hairspray for finishing touch because of the rainy weather.
I was dancing whole night and even took part in a Jack & Jill competition and hair stayed put!

If I want to have my hair curly also the next morning, I pin it back onto curls before going to bed. A good look for the second day hair is to wear a bandanna for "Rosie the Riveter"-look


Suomeksi: Lyhyehköön polkkatukkaan saa helposti vintage-tyylisen kampauksen pinnikiharoilla. Suosittelen katsomaan tämän videon, jossa on yksityiskohtaiset ohjeet, miten hiukset kannattaa valmistella ja miten kiharat tehdään. Huolellinen pohjatyö on kaikkein tärkein vaihe pinnikiharoissa; jos joku hiustupsu jää suoraan alkuvaiheessa, sen todellakin huomaa lopputuloksessa.

Itse olen yrityksen ja erehdyksen kautta havainnut, että näin lyhyissä hiuksissa pinnit eivät välttämättä pysy paikallaan nukkuessa, joten pyrin tekemään kiharat vasta muutama tunti ennen iltaa. Noin 3 tuntia riittää jos hiukset ovat vain vähän kosteat. Prosessia voi nopeuttaa hiustenkuivaimella, samalla huomaa jos joku kihara on huonosti kierretty ja hiuksia alkaa törröttää kiharasta ulos. Mikäli niskahiukset ovat todella lyhyet, voi ne käsitellä erikseen kihartimella silllä välin kun muut hiukset on pinneillä kiinni.

Ylimmässä kuvassa näkyy, että olen kiertänyt päälimmäiset hiukset aika löysästi kiharoille.Halusin päällihiuksien kihartuvan vasta latvaa kohden, jotta saan kiharoiden painopisteen alemmaksi, ja hiukset on helpompi saada sileäksi päältä.

Pinnikiharoista saa villin näköiset jos hiuksia ei kampaa kunnolla auki, mutta jos haluaa vintage glamour-tyylisen kampauksen, kiharoiden aukiharjaaminen on tärkeää. Kun pinnit irrottaa, kiharat näyttävät usein aikamoiselta harakanpesältä. Tästä ei kannata pelästyä, vaan ottaa hiusharja kauniiseen käteen ja alkaa kärsivällisesti muotoilemaan kiharoita haluttuun muotoon. Irtohiukset voi silottaa paikalleen esimerkiksi hiusvahalla. Jotta kampaus kestää kosteutta ja tanssilattialla pyörimistä, kannattaa kiinnittää kiharat paikoilleen hyvällä hiuslakalla.

Hiukset saa pysymään kiharalla seuraavaan päivään, kun kiertää ne suurinpiirtein takaisin kiharoille ja kiinnittää pinneillä yöksi. Jos kiharat eivät ole aamulla enää parhaassa terässä, voi laittaa huivin päähän Rosie the Riveter-tyyliin.


Sunday, May 27, 2012

Canvas sneaker revamp


The sun is shining and I feel like dancing! 
I love to wear heels but a girl's gotta have some flats too, especially in summertime when dancing outside on rough wooden floors. Simple sneakers are great for dancing, but they can look too sporty to wear with a skirt or a dress, so I turned my plain sneakers into a canvas for artistic experiments.


I used craft paints suitable for wood, paper etc. and a white fabric marker for sharpening the outlines of my drawings. I googled "old skool tattoos" and "tattoo shoes" for artwork ideas. I pretty much just copied what I liked and thought I can draw on such small space with equipment I already had.


Here are the ready ones, they look the same but not so much that it'll look factory made. I'd love to try this on pumps too, but I need more practice and finer brushes.

Put on your dancing shoes!


Tuesday, May 8, 2012

Femme Fatale lace earrings DIY

I saw some cool lace earrings on Etsy that cost 20 $. They'd be the perfect  accessory to wear in a Milonga (Argentine tango event) with a nice dress. But before adding those earrings to cart I decided to give it a go and try making a pair myself. They turned out fine!


I think they'd look better if the lace had more volatile pattern in it, but it's fine like this for me.

How-to: Cut two identical pieces following the pattern in the lace. The lace needs to be starched with something that doesn't have color when dried (sugar water or glue water). First I tried sugar and water and then tried glue water for another pair. Glue (water based craft glue) worked better I think. I didn't measure the glue, just put some on a plate and added little bit of water to form a liquid. I soaked the lace pieces there for a while (10 minutes or so) and then placed them over a plastic film to dry. The lace is now firm, but not scratchy hard.
The part where you place the hook needs to be reinforced so that the lace doesn't start to fray. Hand stitching works fine here.


Saturday, February 4, 2012

Valeotsatukka

Halusin tänään jotain erilaista ja näpertelin aamulla itselleni valeotsiksen. Ei sillä että olisin sitä minnekään ruokakauppaa pidemmälle päässyt esittelemään. Tarkoitus oli lähteä illalla kuuntelemaan bändejä ja vähän tanssahtelemaankin, mutta tässä flunssassa on paras pysyä kotona kuuma juoma nenän alla. No, aina ei voi saada kaikkea...


Hommahan etenee niin että hiuksista erotetaan keskeltä otsaa (halutun korkuinen) kiila, joka levenee kohti hiusrajaa. Perinteinen versio on rullata hiukset latvasta alkaen valkin ympärille ja muotoilla vähän, plus kiinnittää lopuksi valkkeineen pinneillä haluttuun muotoon. Pinnit tulevat piiloon hiusrajaan rullan alle.

En ole vielä koskaan saanut omiin hiuksiini onnistumaan valeotsatukkaa valkilla. Siitä tulee yksinkertaisesti joko järkyttävän massiivinen, tai sitten en vaan saa millään sivuja kaartumaan siististi. Tämän vuoksi jätän valkin pois kokonaan, lakkaan hiukan päältä ja alta, jotta lyhyemmät hiukset pysyvät siististi mukana, tupeeraan hiukan alapuolelta ja käärin sitten rullan sormin "tyhjänä". Tämän version hyvä puoli on se, että voin tehdä juuri sen kokoisen rullan kuin haluan. Myös sivut saa kaartumaan kuten haluan ja pysymään siivoina, koska voin tiukentaa rullaa niissä hieman jälkikäteen kiinnitettyäni keskikohdan ensin hiusrajaan.

Kun koko rulla on muotoiltu ja kiinnitetty, lakkaa päälle karkuhiusten pitämiseksi aisoissa ja menoksi... vaikka sitten sinne ruokakauppaan.

Tuolla huivin alla on oikeasti myös pienet victory rollsit tasapainottamassa tilannetta (tästä piti tulla vähän isomminkin kampaus), mutta valeotsis toimii niin hyvin huivin kanssa, että yleensä riittää kun hiukset takana kietaisee litteähkölle sykerölle ja sitoo huivin päälle.

Thursday, December 8, 2011

Party pumps

Take your ordinary black pumps to the next level by adding some decorations to them.


I used leather ribbon and black satin rose to give my black pumps a rock'n'roll twist. First I glued the ribbon into a bow and then glued the rose on top. When they were dry I glued them in place with a glue gun. If you don't want the decorations to be permanent you can use a clip on earring base for the bow.

Suomeksi: Tavalliset mustat korkokengät muuntuvat pikkujouluhenkisiksi ja vähän rokahtaviksi värillisestä nahkanauhasta taitetulla rusetilla. Rusetin päällä koristeena musta silkkiruusu. Kiinnitin koko systeemin kenkään kuumaliimalla.

Sunday, October 16, 2011


Vintage style party hair in 10 minutes - Vintage-kampaus 10 minuutissa

Joskus on ihanaa istua koko lauantai rullat päässä ja valmistautua illan rientoihin, mutta yhä useammin (varsinkin reissatessa) joutuu turvautumaan nk. "pikanutturaan", jonka saa kyhättyä kokoon tarpeen vaatiessa alle 10 minuutissa.
Tässä pikanutturan salaisuus:


1. Tee ponnari
2. Tupeeraa hiukset kammalla reilusti, jätä päälimmäiset hiukset suoriksi
3. Taita ponnari ylös ja kiinnitä pinneillä . Asettele pinnit limittäin vaakasuuntaan n. 10 cm leveydelle
4. Taita ponnari varovasti takaisin alas ja siloita pinta kammalla
5. Taivuta latvat ponnarin alle ja kiinnitä pinneillä samaan tapaan kuin yläosa (pinnit jää piiloon)
6. Levitä hiukset varovasti niin, ettei pään sivuille jää koloja, siloita kammalla & suihkuta hiuslakkaa
Etuhiukset:
7. Tupeeraa alta, kampaa sivuun, siloita pinta, suihkuta lakkaa
8. taivuta etuhiusten latvat piiloon etuhiusten alle, kiinnitä pinneillä
9. Lisää koristeet (kukkia, rusetti, pitsinauhaa...)

Every girl needs her own emergency hairdo that can be done in 10 minutes or less.
I usually have my hair on ponytail at home, so that’s where my emergency hairdo starts from.
On average I use 10 to 15 bobby pins for this hairdo. I like this hairdo because it doesn’t get ruined in humid weather or if I’m dancing all night.
1. Make a ponytail
2. Tease the hair on ponytail and use hairspray
3. Fold the whole ponytail up and fasten horizontally with bobby pins.
4. Fold the ponytail back downwards, use comb and hairspray to make it smooth
5. Fold the ends under the bun and fasten with bobby pins
6. If there are any gaps left, use comb and hairspray
- the last part for long bangs -
7. Tease the hair in the front, comb to one side, use hairspray
8. Fold the ends under the hair like above, use 1 or 2 bobby pins to fasten
9. Hairspray, place decorations

Tip: You can just wrap a bandanna to this hairdo the next morning and have Rosie the Riveter look for Sunday brunch.


Sunday, August 21, 2011

Knitting, anyone?

If you're into knitting and vintage, there are many great online resources for free intructions. One of the best (IMHO) is the Victoria and Albert Museum's 1940's collection.


Scarfs, hats, jumpers and so much more. Even fishnet stockings! And it's not all just for women, there are patterns (mittens, pullovers, hats...) for men too! So, if you're into vintage knitting, this is a must see.

Go ahead, knock yourself out! ;)

Monday, August 1, 2011

Half-moon manicure with two tones

Summer holiday is over and I got the blues...
Cherry's blog post inspired me to try the half-moon manicure with baby blue and bright white.
I applied the blue color first and let it dry well before adding the white half-moons with a nail color pencil.

Tuesday, July 19, 2011

Half-moon manicure - History and how-to

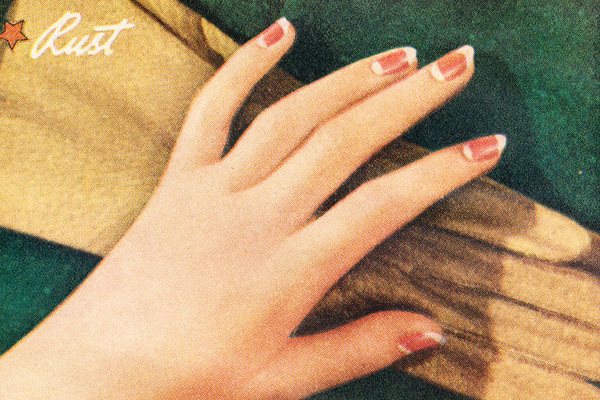
Half-moon manicure was popular in one form or another from 1920's to 1940's. In 1920's and until late 30's the tip of the nail was also left bare (or colored with lighter color). 

Cosmopolitan Magazine, December 1936. (Picture from here)
In the late 30's it became fashionable to leave only the "half-moon" bare. The trend continued into 1940's and is the look people now normally associate with half-moon manicure. According to some sources the bare sliver on the tip of the nail made also a comback in the 40's. (This page offers a cute summary of makeup styles from 20's to 40's if you're interested...)

I used think that in the olden days the nail polish came only in shades of red and pink was the wildest thing. However the nail polish colors were diverse even back in the days. Colors like silver, gold, green, blue, violet, black and mustard yellow might not have been the most common choice, but they were an option. 

Ladies Home Journal, June 1945. (Picture from here).
Mavala nail polish is my favourite because of the durability and breathability. My favourite shades include:
Smoky Blue
Touch of Provence
Cyclades Blue
Bronze Green
Anchorage
Smoky Blue
Madrid (red)
Paris (red)

The non-reds are my special favourites for a half-moon manicure. Just now I have my eyes on their Blue Curacao, Jazz Club, Music Hall and Acid Yellow.

I love half-moon manicure. It's very durable (Usually my nailpolish starts to peel off from the lower part of the nail that is now left bare and thus: no peeling!) and easy and adds that certain something to your vintage look. This time I used Bronze Green. (If my hand looks strange in the picture it's just because I scanned it... with a copy machine. No cameras around, you see. ;)
 
Fun with copy machine.
Some people like to use guides when they apply the nail polish, but I think they're bit messy if you're in a hurry and don't have time to wait for the polish to dry completely. I've tried using guides, but free-hand method works best for me.

First (after applying and drying the base coat) I decide the height of the half-moon and then go for the first stroke of brush from the highest point towards the tip of the nail. After that I make the second and third stroke with a tilted brush so that a half-moonish shape is left bare. It doesn't need to be perfect right away because I'll add another coat later and perfect the shape.

The method.
If I get nail polish on the half-moon area, or if the shape doesn't appear good enough I scrape the excess off with a toothpick while the polish is still soft (but not that wet). Finally I top everything with Mavala Minute-Quick-Finish that not only adds a top coat, but also dries the polish very fast to a point where it doesn't smudge everything and does not get scuffed that easily.

My nails are quite light in color, so I usually don't color the haf-moons. Sometimes I've used beige or white nail polish though. For a more festive look I've used layer or two of gold or silver nail polish under the main color. This gives the half-moons nice finish. 

Summary in finnish: Puolikuumanikyyri oli suuressa huudossa 1920-luvulta 1940-luvulle ja on nyt vaihteeksi taas melko muodikas... ja antaa toki mehevän lisän vintage-tyyliin. Itse tykkään ko. manikyyristä sen kestävyyden vuoksi. Jostain syystä koko kynnen lakkaukset alkavat yleensä kuoriutua muutaman päivän kuluttua, mutta puolikuumanikyyri pysyy minulla siistinä vähintään viikon. Useimmissa ohjeissa käytetään tarroja ohjaamaan lakan levitystä, mutta itse pidän eniten "vapaan käden taktiikasta". Lakan levitys aloitetaan puolikuun korkeimmasta kohdasta kohti kynnen kärkeä. Ensimmäistä siveltimenvetoa seuraavat kaksi tehdään pitämällä sivellintä vinossa siten että kynnen alaosaan muotoutuu puolikuuta muistuttava kaari. Ensimmäisellä kerroksella ei tarvitse pyrkiä täydellisyyteen, sillä muotoa pystyy muokkaamaan vielä toisella kerroksella. Puolikuun siistimiseen tarvittaessa käytän yleensä hammastikkua kunhan lakka on ehtinyt vähän kuivahtaa. Puolikuumanikyyriin käytän punaista lakkaa vain harvoin. Vaikka punainen saattoi olla yleisin väri, on muitakin, villejä värejä ollut tuotannossa jo vähintäänkin 30-luvulta.

Thursday, July 7, 2011

New life for old dancing shoes

I bought these used dancing shoes about a year ago and did not quite like the plain white color.
 
At first I thought I could paint them with silk colors or draw some pattern in them but I was worried the outcome would not be neat. Then I came up with an idea of attaching some ribbons or fabric on them. I found this light weight brown lace from the local craft shop and decided to try to glue it on.


Here are some tips if you like to do the same for your shoes:

I removed the t-strap to make the shoes look more like tango shoes (1.)

Cut a piece from the lace, and try it on the shoe in different angles (2.)

Pin the lace on the shoe and cut off excess (3.)

Glue the trimmed end first (it would have been easier to use lace ribbon instead of this one I used, since this was too wide for the shoe and it had to be cut), be careful with the glue, it gets everywhere.
Trim the sides so that there’s only about 2 mm extra lace, use pins to tuck the ends between sole and the shoe, use the glue generously here (4.)

Be careful not to leave any bumps on the inside of the shoe if you fold the lace and glue it there (that’s how I did it)

Here's the outcome:


Some thoughts: I think the shoe would look nice if there’d be some color on the heel part too. I’m still looking for rhinestones or such to complete the new look.

 
I’ve danced argentine tango wearing these and even got stepped on a few times and the lace stayed put. Bad for my toes, but good to know the glue holds well.

Summary in finnish: Käytin Gutermannin kangasliimaa tuunatakseni vanhat lattarikengät tangokuntoon. Ennen liimaamista kangasta kannattaa sovitella eri kulmissa kengän päälle. Helpointa on käyttää kapeampaa pitsinauhaa, jolloin ei joudu taittamaan pitsiä kengän sisäpuolelle. Kengän reunoissa käytin runsaammin liimaa ja painelin neulaa apuna käyttäen pitsin pohjan ja kengän pääliosan väliin. Pitsi ja liima löytyivät Tampereen Kauppahallin nappikaupasta.